
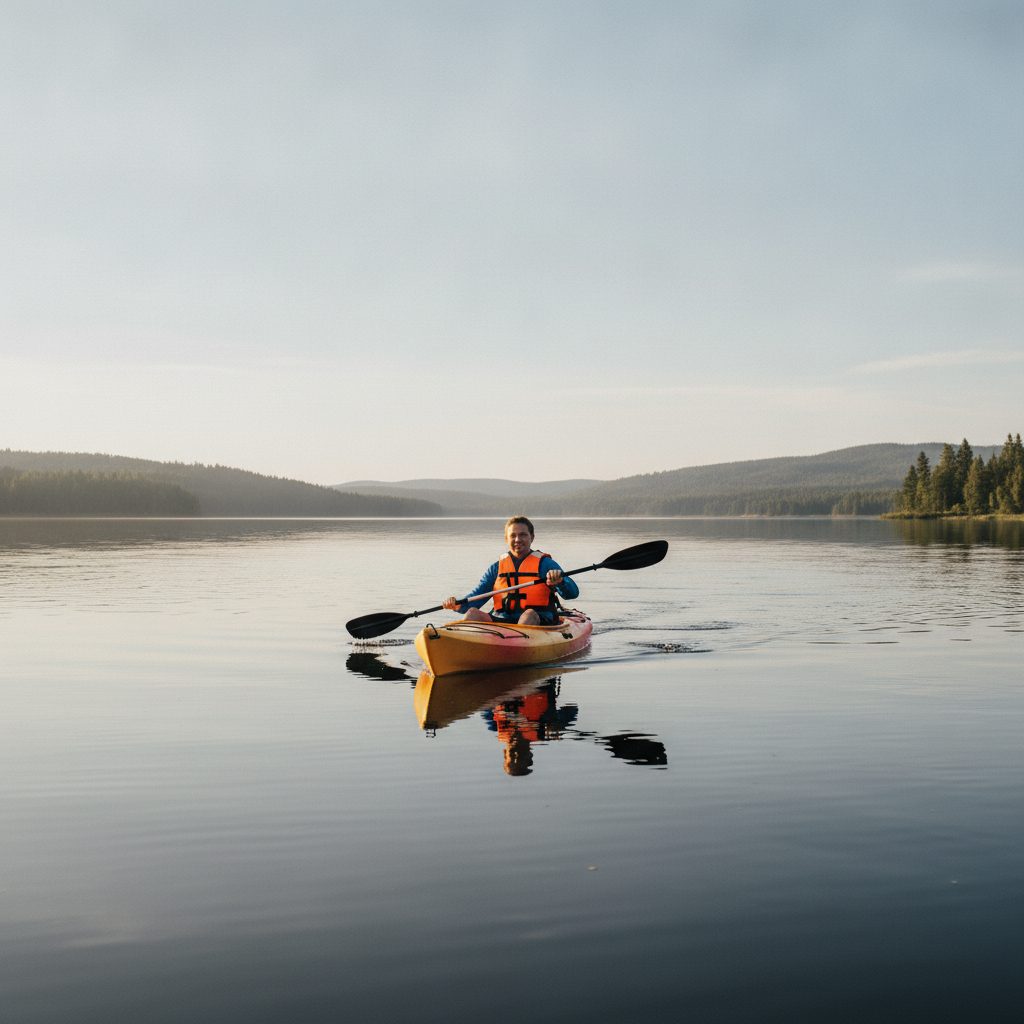
Kayaking for Beginners: Everything You Need to Know
Everything you need to know before your first paddle stroke — gear, technique, safety, and the mistakes most beginners make.
Kayaking is one of the most accessible outdoor sports on the water, and most people can learn the basics in a single afternoon. But going in blind — wrong gear, wrong technique, wrong conditions — turns a great day into a miserable one fast. We’ve paddled a lot of entry-level boats, coached total newcomers, and made plenty of our own early mistakes, so this guide is built from real experience: what actually matters, what you can safely ignore on day one, and how to get comfortable on the water without overcomplicating it.
The Gear You Need Before You Launch
You don’t need a garage full of equipment to go kayaking. You need the right essentials — and one or two of them are non-negotiable from a safety standpoint.
- PFD (Personal Flotation Device): A USCG-approved life jacket is the single most important piece of gear you own. The leading cause of kayaking deaths is drowning, and the majority of victims were not wearing a PFD. Wear it. Don’t lash it to the deck and call it good. A Type III paddle-sport PFD is comfortable enough that you’ll forget it’s on.
- The kayak: Covered in the next section — but rent before you buy if this is your first time out.
- Paddle: A paddle sized to your height and boat width. Most rental outfitters will size this for you. Aluminum shafts are heavy but durable; fiberglass is lighter and worth it once you know you’ll stick with the sport.
- Water shoes or sandals with heel straps: Flip-flops come off in the water. Bare feet get sliced on oyster beds and rocky launches. Closed-toe water shoes or Chacos-style sandals are the move.
- Whistle: Required by law in most states for human-powered craft. Clip one to your PFD and never think about it again — until you need it.
- Sun protection: The water reflects UV at you from below while the sun hits you from above. SPF 50+ sunscreen, UV-blocking sunglasses, and a wide-brim hat are standard equipment on any trip longer than an hour.
- Dry bag: Your phone, keys, and any extra layers go in a waterproof dry bag clipped inside the cockpit or bungeed to the deck. Assume everything gets wet eventually.
Choosing Your First Kayak
The kayak market is enormous and the jargon can be disorienting. For a first-timer, the decision comes down to two kayak types and a handful of dimensions. We’ve done a deep dive on sit-in vs. sit-on-top kayaks, but here’s the short version:
| Feature | Sit-On-Top | Sit-Inside |
|---|---|---|
| Stability | Very forgiving, harder to flip | Good, but narrower models tip more |
| Re-entry after capsize | Easy — just climb back on | Harder — requires practice |
| Dry ride | No — you’ll get wet | Yes — cockpit keeps legs dry |
| Best for | Warm-weather paddling, fishing, beginners | Cooler conditions, touring, more control |
| Storage | Bungee deck rigging | Sealed hatches, more dry storage |
For most beginners in warm-weather conditions, a sit-on-top is the safest and most forgiving starting point. If you’re paddling in cooler temps or want more control as you progress, a recreational sit-inside kayak in the 10–12 foot range is the standard recommendation.
The dimensions that matter:
- Length: 10–12 feet is the sweet spot for beginners. Shorter boats are maneuverable but slow; longer boats track straighter and cover distance better but are harder to turn.
- Width: Look for a beam (width) of 28–32 inches. Wider boats are more stable — a 30-inch-wide hull is the benchmark for recreational paddlers who want confidence without sacrificing too much speed.
- Weight capacity: Your body weight plus any gear, multiplied by 0.7. If the manufacturer lists a 300 lb. max, plan to load it no more than 210 lbs. for a stable, responsive ride.
- Tracking: Kayaks with a keel or longer waterline hold a straighter course. Beginners burn a lot of energy constantly correcting a boat that wanders — prioritize good tracking over pure maneuverability.
Still figuring out which hull length fits your paddling style and body? Our kayak sizing guide walks through the math. And if storage or transport is a constraint, inflatable kayaks have gotten genuinely good — worth a look before you commit to a hardshell.
How to Get In and Launch Without Embarrassing Yourself
The launch is where most beginners tip over before they’ve even paddled a stroke. The key is to keep your center of gravity low and the boat stable. Here’s what works:
- Launch from a shallow, calm area: Avoid steep banks, rocky shores, or spots where boat traffic creates wakes. A gradual sandy or gravel beach is ideal.
- Position the kayak parallel to shore in shallow water: You want the boat floating — not dragging on the bottom — but close enough that you can step in without deep water on the other side.
- Use the straddle method: Stand over the cockpit, one foot on each side of the hull, and slowly lower yourself into the seat. Keep your hands on the gunwales (the edges of the cockpit) for stability as you bring your feet in one at a time.
- Keep your weight centered and low: Don’t reach out to one side or lean over the bow before you’re seated and balanced.
- Push off with your paddle: Plant the blade in the shallow water or against the bank and use it to gently push yourself clear before your first stroke.
Getting out is the reverse: paddle toward shore at a shallow angle, plant your paddle for stability, and step out one foot at a time into shallow water. Don’t try to stand up inside the cockpit.
Basic Paddling Technique: The Three Golden Rules
You don’t need perfect form on day one, but understanding these three principles early will save you a lot of tired arms and sore shoulders down the road.
Rule 2: Maintain the paddle box. Keep your hands roughly shoulder-width apart on the shaft and your elbows at or below shoulder height at all times. This “power position” protects your shoulder joints from impingement and gives you a mechanical advantage on every stroke. Drop your elbows, and you’re working harder for less output.
Rule 3: Separate your upper and lower body. Your hips and lower body control the boat; your torso and arms drive the paddle. Learning to feel how your weight shifts and how that affects the hull is how you go from “surviving” to actually paddling well.
The forward stroke in three steps:
- Catch: Reach forward and plant the blade fully in the water near your feet, keeping the top arm roughly at eye level.
- Power phase: Rotate your torso and pull the blade back through the water — not past your hip. The stroke ends at your hip, not behind you.
- Exit: Slice the blade out cleanly and set up for the next stroke on the opposite side.
Stopping: Plant the blade flat against the water’s surface (a “stern rudder”) or use short, aggressive reverse strokes on both sides to brake.
Turning — the sweep stroke: To turn left, take a wide arcing stroke on your right side, starting at the bow and sweeping out and back toward the stern in a C-shape. The wider the arc, the more the boat pivots. Practice this both directions until it’s automatic.
Safety Rules Every Beginner Must Know
Kayaking is genuinely safe when you respect the conditions. When people get into trouble, it’s almost always because they ignored one of these rules.
- Start on calm, flat water: A sheltered lake, a slow-moving river, or a protected bay is where you learn. Ocean surf, tidal currents, and open water crossings are for after you’ve built skills and experience. Even a 1–2 mph current can be more than a beginner can handle when tired.
- Wear your PFD every time, on every trip: Not on the deck. On your body, buckled. No exceptions. The U.S. Coast Guard is clear that the majority of paddling fatalities involve victims who were not wearing a life jacket. That’s a fully preventable statistic.
- Never paddle alone: Go with at least one other person. If you can’t, tell someone exactly where you’re going and when to expect you back. A solo swimmer a half-mile from shore is a serious problem.
- Check wind and weather before you go: Water conditions can change faster than you expect. Wind creates chop; chop creates waves; waves swamp cockpits. Check the forecast and build in a buffer — if conditions look marginal, they’ll probably be worse on the water.
- Know the 120 Rule for cold water: Add the air temperature and water temperature together. If the sum is below 120°F, treat it as a cold-water situation and dress accordingly. Cold water shock — the involuntary gasp reflex triggered by sudden immersion in cold water — can cause drowning even in strong swimmers within the first 30 seconds of capsize. This is why “dress for the water” is non-negotiable.
Common Beginner Mistakes (and How to Skip Them)
We’ve watched a lot of people pick up a paddle for the first time. These are the mistakes that show up almost every time:
- Paddling with your arms: Already covered under technique, but worth repeating because it’s that universal. The fix is to slow down and focus on torso rotation before you add any power.
- Gripping the paddle too tight: A death-grip tires out your forearms fast and reduces feel for the blade. Hold the shaft firmly but not white-knuckle — think of it like holding a hammer, not wringing a towel.
- Sitting with a rounded back: Slumping forward collapses your core and disconnects your torso rotation. Sit tall, brace your feet against the foot pegs, and engage your core like you’re about to take a punch.
- Going too far on the first trip: A flat-water paddle in calm conditions is more tiring than it looks, especially if you’re fighting wind on the return. Go out for 30–45 minutes and turn around earlier than you think you need to. You’ll be glad you did.
- Not checking the shuttle or exit point: If you’re paddling a river or a point-to-point route, confirm where you’re getting out before you put in. Getting stuck at a takeout you can’t find is not fun.
- Skipping the weather check: It was mentioned in safety, but it belongs here too. Afternoon thunderstorms are common in summer. Wind picks up through the day. Leave early, paddle early.
- Buying before renting: Rent two or three times at different locations before you spend money on a boat. Your taste in hull type, length, and style will shift after you’ve paddled a few different boats. This single piece of advice saves most people from an expensive mistake.
Next Steps: Building Your Skills
After a few successful flat-water sessions, you’ll start to feel the pull toward more — longer distances, different water types, maybe a kayak of your own. Here’s how to build smart:
- Take a lesson: A half-day course from a certified American Canoe Association instructor is the fastest way to fix technique problems that would otherwise take months of self-correction. Even one session makes a measurable difference.
- Practice wet exits and re-entry: Before you paddle anywhere serious, practice capsizing in shallow warm water and getting back in. Knowing exactly what to do when you flip removes most of the fear around it.
- Add distance gradually: Add 15–20 minutes to your trips as your fitness and technique develop. Kayak endurance builds quickly once your technique is clean.
- Explore different hull types: Once you’re comfortable in a recreational boat, try a touring kayak (longer, faster, more tracking) or a wider fishing-specific hull. Each type teaches you something different about how boats handle.
When you’re ready to look at gear, our best beginner kayak guide covers the specific boats we’d actually recommend to a friend — broken down by budget, size, and use case. And if you’re still working out the right length for your frame and paddling style, our sizing guide will save you a bad purchase.
Frequently Asked Questions
Is kayaking easy for beginners?
Yes — the basics are accessible in a single session. Most beginners can launch, paddle in a straight line, and return to shore within the first hour. What takes longer to develop is efficiency: learning torso rotation, reading water, and building endurance. Starting on calm flat water in a wide, stable recreational kayak makes the learning curve much gentler than jumping straight into current or open water.
What type of kayak should a beginner get?
For most beginners, a recreational sit-on-top or sit-inside kayak in the 10–12 foot range with a width of 28–32 inches is the right starting point. Sit-on-tops are more forgiving and easier to re-enter after a capsize, making them ideal for warm-weather paddling. Sit-inside models keep you drier and offer more control in cooler conditions. Rent a few times before buying so you know what you actually prefer.
Do kayaks flip easily?
Recreational kayaks are designed to be stable and resist tipping under normal conditions. Wide, flat-bottomed hulls are hard to flip accidentally. That said, standing up, leaning hard to one side, or paddling in rough water or strong currents can capsize any kayak. Beginners should stick to calm, flat water where tipping is unlikely, and practice wet exits and re-entry in shallow conditions so a capsize is a minor inconvenience, not an emergency.
What should I know before buying a kayak?
Rent before you buy — this is the single most important piece of advice. Try at least two or three different hull types before committing. When you’re ready to purchase, match the kayak to your primary use case (fishing, day touring, calm lakes), check the weight capacity against your body weight plus gear, and factor in how you’ll transport and store it. A kayak you can’t easily move or store is one you won’t paddle.
How long should a beginner kayak for?
Start with 1–2 hours on the water, which typically translates to 2–4 miles depending on conditions and pace. Paddling is more tiring than it looks, especially when you’re still developing technique. Turn around earlier than you think you need to — you’ll be paddling against wind or current on the return more often than not. Build up trip length gradually over multiple outings as your fitness and efficiency improve.
What should you not do while kayaking?
Don’t paddle without a USCG-approved PFD on your body. Don’t go alone, especially as a beginner. Don’t paddle in conditions beyond your skill level — strong wind, current, or open water crossings are not beginner territory. Don’t ignore the 120 Rule and underdress for cold water. Don’t stand up in the kayak unless you’re in very calm, shallow water. And don’t skip the weather check — afternoon conditions are almost always worse than morning conditions.