How to Surf: A Step-by-Step Beginner’s Guide
Everything you need to know to catch your first wave, from choosing the right board to standing up and riding it in.
Best beginner surfboardsSurfing looks effortless from the beach, but your first few sessions will remind you that it takes real practice, patience, and a willingness to wipe out a lot. The good news is that with the right gear, the right spot, and a clear sequence to follow, most beginners are riding whitewater within a day or two — and catching real green waves within a few weeks. We’ve been through the beginner grind ourselves, and this guide gives you exactly what we wished someone had told us on day one.
Step 1: Get the Right Board and Gear
Before you ever see the ocean, your most important decision is the board. Beginners need volume — lots of it. A bigger, thicker board paddles easier, catches waves earlier, and gives you a stable platform when you’re trying to stand up for the first time. The short, narrow boards you see pros riding are the worst possible choice when you’re learning. They’re unforgiving, hard to paddle, and almost impossible to pop up on in the broken surf where you’ll be starting.
The right choice is a soft-top surfboard, also called a foamie. Soft-tops are made with a foam deck and soft edges, which means when (not if) the board hits you in the head or bounces back into your body, it won’t cause serious injury the way a fiberglass board will. They’re also more buoyant than hard-tops of the same length, which makes paddling and catching waves noticeably easier.
For sizing, beginners should start on a board that’s at least 8 feet long — 9 feet is even better. A longboard or a dedicated beginner soft-top in the 8–9 foot range gives you the paddle power and stability you need. Check our best beginner surfboards guide for our top picks, and our best soft-top surfboards roundup if you want to go straight to the foamie options.
Beyond the board, here’s the core gear you need:
- Leash: A surf leash attaches your ankle to the board. If you wipe out and the board gets away from you, the leash keeps it close — protecting you and other surfers. Never surf without one.
- Wetsuit: Depends on your water temperature. In cold water (under 65°F), a 3/2mm full wetsuit is the minimum. In warm tropical water, boardshorts or a rashguard may be all you need.
- Rashguard: Prevents board rash on your chest and stomach from paddling, and adds sun protection.
- Sunscreen: Use a reef-safe, water-resistant SPF 50. You’ll be outside for hours, and reflected sun off the water amplifies exposure significantly.
See our full beginner surfing gear checklist for everything you’ll need before your first paddle-out.
Step 2: Choose the Right Spot and Know the Rules
Where you surf matters as much as how you surf. As a beginner, you want a beach break with a gently sloping sandy bottom and small, consistent waves — ideally 1 to 3 feet in the whitewash. Avoid rocky shores, reef breaks, or anywhere with heavy shore-pound (waves that slam straight down onto the sand). The ideal beginner wave is a slow, rolling wave that breaks on a wide sandbars and gives you a long, forgiving ride into shore.
Most beaches with surf have a clear breakdown: the whitewash (also called broken waves or whitewater) is the white foamy water after a wave has already crested and broken. The green waves are the unbroken walls of water further out. Start entirely in the whitewash. The waves are slower, weaker, and shorter — which means you can practice the pop-up over and over without having to paddle hard or time anything precisely.
A few more safety basics: always check the surf report before you go. Apps like Surfline or Magic Seaweed give you real-time conditions. If the waves are overhead or there’s a strong rip current (a fast-moving channel of water pulling away from shore), that’s not a day for beginners. Learn to identify rip currents — they look like a dark, choppy channel between two areas of breaking waves. If you get caught in one, don’t fight it by swimming directly to shore. Paddle parallel to the beach until you’re out of the current, then angle back in.
Step 3: Paddling and Board Positioning
Most of surfing is paddling. A beginning surfer spends 90% of their time in the water paddling — out through the whitewash, into position, and then paddling to catch a wave. Getting your paddle technique right early makes everything else easier.
Start by lying on your board on the beach and finding your paddling position. You want to be centered lengthwise (not too far forward, not too far back) and centered side to side. When you’re in the right spot, the nose of the board should be about 2–3 inches above the waterline when you’re paddling. If the nose is too high, scoot forward a few inches. If the nose is diving underwater (called pearling), scoot back.
Your paddle stroke should be long and deep, not quick and splashy. Cup your hand slightly, enter the water near the nose, pull all the way back past your hip, and exit cleanly. Alternate arms smoothly. Keep your head up and look where you’re going, not straight down at the board.
To get through the whitewash on the way out, you’ll use a technique called the push-up, or turtle roll on a longboard. When a wave of whitewater is about to hit you, grab the rails (sides) of the board firmly, roll the board upside down so you’re underneath it, and let the foam pass over you. Then roll back up and keep paddling. It takes a few tries to get the timing right, but it works.
Use our surfboard size chart and volume calculator to confirm you’re on a board with the right volume for your weight — this makes a bigger difference to paddling power than most beginners realize.
Step 4: The Pop-Up, Step by Step
The pop-up is the single motion that takes you from lying on the board to standing on it. It sounds simple. In practice, it’s the thing most beginners struggle with the longest, because it requires timing, muscle memory, and a kind of full-body commitment that feels unnatural at first. The trick is to practice on dry land until the movement is automatic before you try it in the water.
Here’s the exact sequence:
- Paddle hard. When a wave approaches from behind, turn the board toward shore and start paddling with strong, committed strokes. You need momentum to match the wave’s speed — if you half-heartedly paddle, the wave will pass under you.
- Feel the wave pick you up. As the wave catches the board, you’ll feel the tail lift and the board accelerate forward. This is your signal. Some coaches call this “feeling the push.” When you feel it, stop paddling — your hands are about to move.
- Place your hands flat under your chest. Like the top of a push-up, hands flat on the deck, beside your lower ribcage. Don’t grab the rails — flat palms give you better push and stability.
- Push up explosively. In one fast, fluid motion, push your upper body up and bring your feet under you. This should be a single movement, not a two-step climb. Think of it less like a push-up and more like jumping to your feet.
- Land in your surf stance. Your feet should land about shoulder-width apart, perpendicular to the stringer (the centerline of the board), roughly in the middle of the board. Bend your knees deeply — stay low. Your arms should be out for balance, one hand pointing roughly toward the nose, one toward the tail.
- Look where you’re going, not at your feet. This is the most common beginner error. The moment you look down, your balance shifts forward and you fall. Fix your eyes on the shore and let your body follow.
Your stance will be either regular (left foot forward) or goofy (right foot forward). Most people naturally know which feels right the moment they stand up. If you’re not sure, whichever foot you’d kick a soccer ball with usually goes in the back.
Practice the full pop-up sequence on the beach — on the grass, on a yoga mat, anywhere flat — at least 20 to 30 times before your first session. The more automatic the movement, the better your in-water attempt will be.
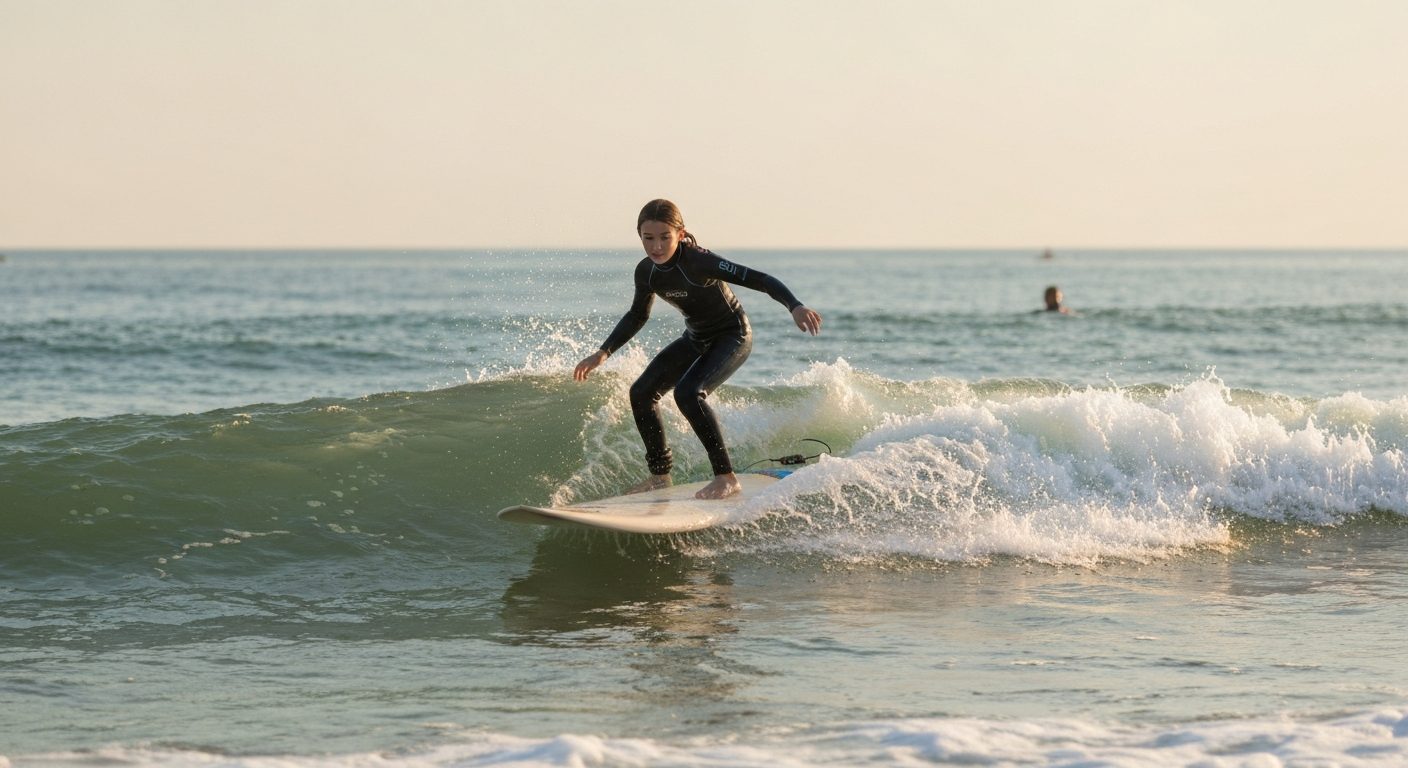
Step 5: Catching Whitewater, Then Moving to Green Waves
Your first sessions should be entirely in the whitewater. This might feel like “baby surfing,” but it’s actually where you build every fundamental skill: reading the wave’s timing, committing to the paddle, executing the pop-up, and finding your balance on a moving board. Skipping this step and trying to catch green waves before you’re ready leads to frustration and wasted sessions.
In the whitewater, the wave has already broken. You position yourself in shallow enough water that you can stand up and walk back after each ride. When a set of whitewash approaches, turn your board toward shore, lie down, and paddle. The broken wave does most of the work — your job is to match its pace with two or three solid strokes, then pop up.
Once you’re consistently standing up in the whitewash — say, 7 out of 10 attempts — it’s time to move out slightly toward the unbroken green waves. Green waves are steeper, faster, and more powerful, which means the timing of your pop-up needs to be quicker. You’ll also need to paddle harder to catch them, since you’re trying to match a faster-moving wall of water rather than the slower-rolling whitewater.
To catch a green wave: position yourself just outside where waves are breaking (the lineup), sitting up on your board straddling it. When a wave approaches, turn your board toward shore early — earlier than you think you need to — and start paddling before the wave reaches you. As it steepens under you and you feel that familiar push, commit to the pop-up immediately. Green waves give you less reaction time than whitewash, which is exactly why all those whitewash reps matter.
Your first green-wave rides will probably be short — a second or two before the wave closes out (breaks all at once) or you fall. That’s fine. Length of ride comes with experience. For now, focus on standing up clean, keeping your weight centered, and staying low with bent knees.
Step 6: Common Beginner Mistakes (and How to Avoid Them)
Every beginner makes the same set of mistakes. Knowing them in advance doesn’t make you immune, but it does help you recognize what’s going wrong mid-session so you can correct it faster.
- Popping up in two separate movements. Most beginners do a push-up first, then try to bring their feet under them. This kills your momentum and balance. The pop-up must be one fluid motion — push and feet arrive at the same time.
- Looking at your feet. As mentioned: the moment your eyes go down, you fall. Train yourself to look at the shore. Your feet know where they are.
- Not paddling hard enough. Timid paddling means the wave passes under you. Commit fully to every paddle attempt — if you’re going to try to catch a wave, give it everything for three or four strong strokes.
- Standing too far back on the board. This causes the nose to shoot up, slows you down, and kills your turns. Your feet should be roughly centered, maybe very slightly back of center.
- Stiff legs. Straight knees mean no shock absorption. Bent knees are your suspension system. If you’re falling sideways constantly, check whether your legs are locked out.
- Paddling out through the break zone. Don’t paddle straight through where surfers are riding. It’s dangerous and it’s rude. Go wide around the break, or wait for a lull between sets.
- Choosing the wrong board. We’ll say it again because it’s the most common mistake of all: too many beginners grab a short board because it looks cool. A board that’s too small for your skill level makes every single part of learning harder. Stay on the foamie longer than you think you need to.
Surfing has a steep learning curve in the first few sessions and a gradual, rewarding one after that. Give yourself grace, stay in the whitewash longer than feels necessary, and remember that every surfer you see ripping the lineup once fell off a foamie in ankle-deep water. The progression is real — you just have to put in the time.
Frequently Asked Questions
How do you pop up on a surfboard?
Place both hands flat on the deck beside your lower ribcage — not gripping the rails — and in one explosive movement, push your upper body up while bringing both feet under you simultaneously. Land shoulder-width apart, perpendicular to the board’s centerline, with your knees bent and eyes forward. Practicing this on dry land 20–30 times before getting in the water is the single fastest way to get it right when a real wave comes.
Where should a beginner surf?
Start at a gentle beach break with a sandy bottom and small, consistent waves in the 1–3 foot range. You want to begin entirely in the whitewater — the broken, foamy water close to shore — where waves are slower and less powerful. Avoid rocky beaches, reef breaks, and any spot with strong rip currents or shore-pound until you have solid fundamentals. Ask locals or a surf shop about the mellowest beginner-friendly break near you.
How long does it take to learn to surf?
Most beginners can ride whitewater and stand up consistently within one to three sessions. Catching and riding real unbroken green waves usually takes a few weeks of regular surfing. Getting to the point where you can pick waves, trim, and make basic turns takes months. True comfort in a variety of conditions takes years. The timeline depends heavily on how often you surf, the quality of your instruction early on, and whether you start on the right board.
Is surfing hard to learn?
The first few sessions are genuinely hard — paddling is exhausting, the pop-up takes muscle memory, and timing a wave feels mysterious at first. But the basics are learnable quickly if you start on the right board (a big soft-top) and focus on the whitewash before moving to green waves. Most people see clear improvement within two or three sessions. The sport has a steep initial curve, but the sense of progress once things click is one of the best feelings in action sports.
What board should I learn on?
A soft-top surfboard (foamie) in the 8–9 foot range is the right choice for almost every beginner. Soft-tops are more buoyant than hard-tops, easier to paddle, more forgiving when they hit you, and significantly easier to pop up on. Avoid short boards, fish shapes, or narrow hard-tops until you can consistently catch and ride green waves with control. Starting on a board that’s too small is the single most common reason beginners progress slowly.
How do I catch a wave?
Turn your board toward shore before the wave reaches you, lie flat, and start paddling with strong, committed strokes to match the wave’s speed. When you feel the wave lift the tail and push you forward, that’s your cue — pop up immediately. Timing and commitment are everything: paddling too late means the wave passes under you, and half-hearted strokes mean you don’t build enough speed. In the whitewash, waves do most of the work; on green waves, you need to paddle harder and earlier.